We love how a fresh fringe instantly adds romance, softness, and an effortlessly relaxed aesthetic to any look. However, behind this natural and seemingly “carefree” appearance lies quite serious maintenance. Most experts agree that bangs should be trimmed every two to four weeks — depending on their shape, thickness, and length. That means regular salon visits, which require both time and effort. It’s no surprise that at some point the thought arises: why not try refreshing your bangs at home?
If you’ve been considering this as well, we have good news. Cutting your own bangs is absolutely possible — the key is to approach it carefully and follow a few simple rules. With the right technique, you can refresh the shape without unnecessary stress or disappointment.
A familiar situation: just a few weeks after a haircut, you look in the mirror and notice that your once-neat bangs have already lost their shape. Strands start to stick out, look uneven, and constantly fall into your eyes.
To help you handle this task, we’ve prepared a simple and easy-to-follow step-by-step guide for beginners. Keep reading to learn the main expert tips and safely refresh your bangs at home.
What you’ll need:
• Professional scissors
• A fine-tooth comb
• A tail comb
• Sectioning clips
• Anti-frizz cream
• Leave-in spray
• Hairspray
1. Prepare your hair
After gathering all the necessary tools, begin styling on freshly shampooed hair. This helps prevent product buildup and ensures a cleaner, neater, and longer-lasting result.
Before blow-drying, apply an anti-frizz cream to your bangs to protect the hair from frizz and give it a smooth finish.
Before blow-drying, apply an anti-frizz cream to your bangs to protect the hair from frizz and give it a smooth finish.
2. Blow-dry your hair
Avoid cutting bangs on wet hair — always trim them when they are completely dry, in their natural state. When wet, hair appears longer and stretched, and once it dries, it shrinks, which may result in bangs that are shorter than intended.
For the perfect shape, create a triangular section: draw lines from the outer corner of one eye to the other. In the center, the length should be approximately 4–5 cm (about 1.5–2 inches) — this helps maintain balance and harmony in the haircut. Gently wrap the selected strands around a natural-bristle brush, creating slight tension. Then blow-dry the bangs, directing the airflow toward the face, and allow them to fall into place naturally.
3. Divide the hair into sections
Now that the hair is completely dry, gently comb it and separate the strands you do not plan to cut. Gather them into a ponytail or secure them with hair clips so they do not interfere with your work. Only the bangs (or the future bangs), shaped into a neat triangle, should remain loose — this will ensure precision and symmetry during the haircut.
4. Section the bangs
Divide the future bangs into three small sections — right, center, and left. Working with smaller strands will make the process more convenient, neat, and controlled.
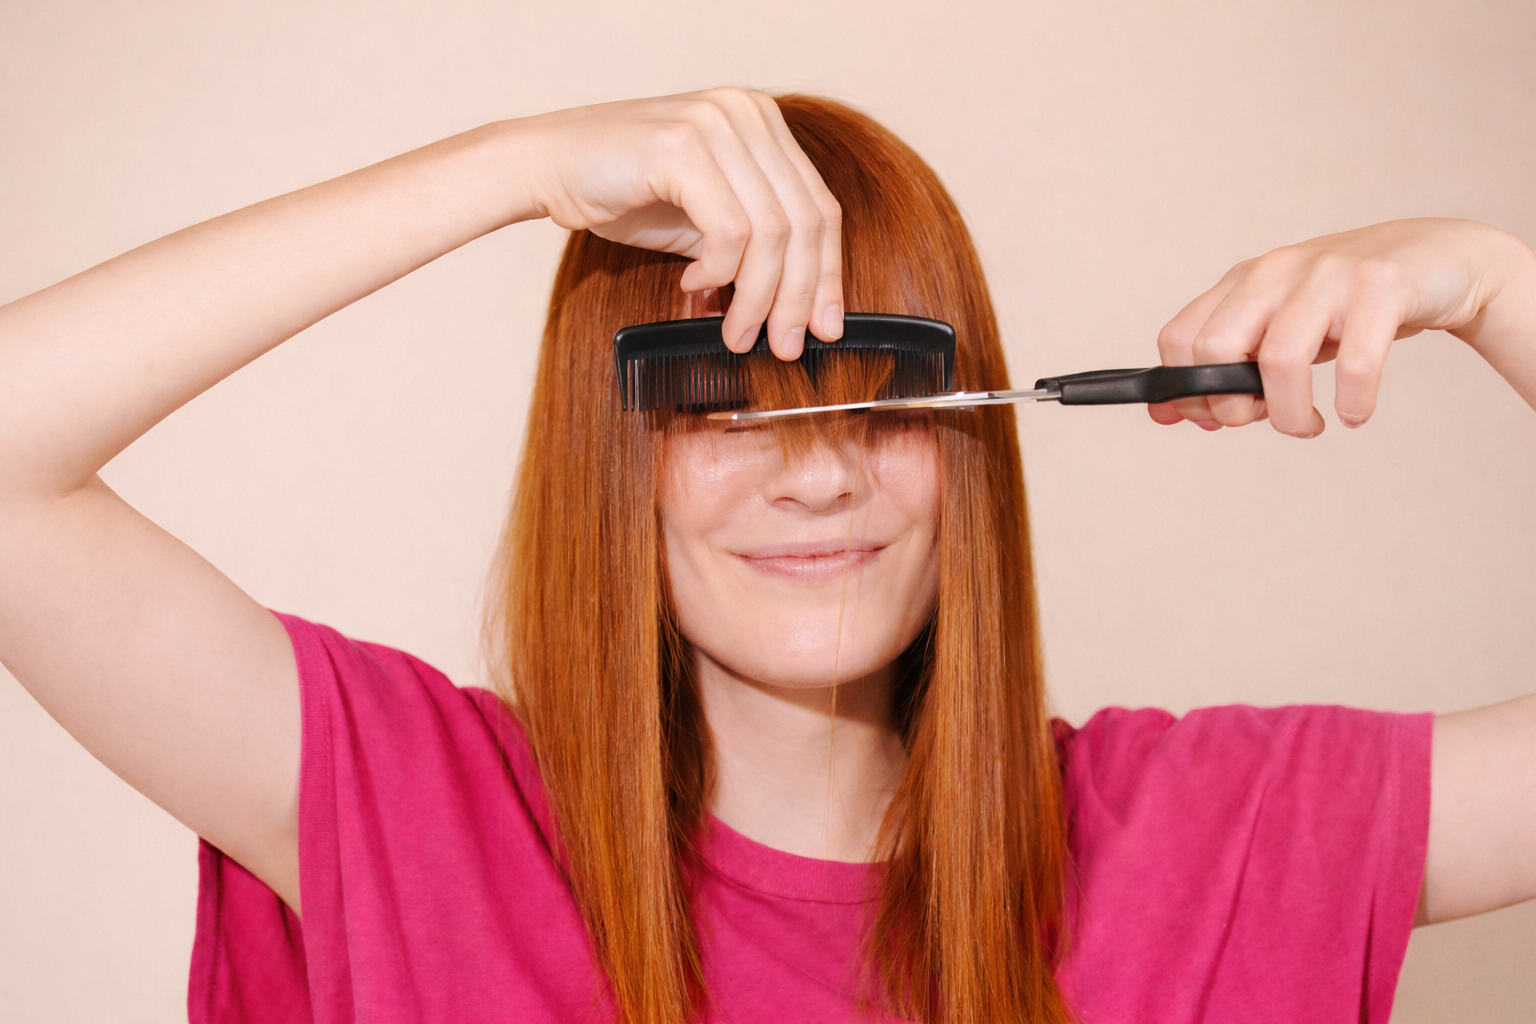
Comb the hair downward, directing the teeth of the comb outward. Then position it at the level of the eyebrow line — this will help determine the optimal length. It is important not to cut the bangs higher than the point reached by the comb on the face in order to maintain the desired result.
Before cutting, carefully pinch the entire triangular section between your fingers for maximum precision. Hold it perfectly straight — do not lift or lower the hair, but guide it forward. This approach will ensure a smoother and more even cut.
5. Cut gradually to achieve a perfectly straight fringe
Skip this step if you have a choppy or face-framing fringe. Use professional scissors and a comb to carefully trim the hair at a 45-degree angle. Work slowly and with maximum attention, removing only a few millimeters at a time.
Do not cut the bangs straight across horizontally — achieving a perfectly even line at home is almost impossible. A straight line can create the effect of a heavy, “harsh” fringe.
After each snip, allow the hair to fall naturally so you can assess the length and shape. Repeat the process gradually, carefully trimming small sections until you reach the desired result.
6. Use a razor to create a face-framing fringe
If you have a choppy, face-framing fringe, it’s better to avoid scissors — they may slip and leave an uneven cut. Instead, use a new disposable razor with a single blade. Double or triple blades are not suitable, as they can split the hair and damage its structure.
To trim your bangs carefully with a razor, slightly stretch the strands by holding them between your middle and index fingers. Glide your fingers down to the very ends, gently cutting the hair with the razor in a controlled motion.
7. Work Methodically When Creating a Textured Fringe
Start with the central section: gently comb the hair and cut vertically, directing the scissors straight upward along the strand. This technique is called point cutting and helps avoid harsh lines, creating a soft, natural texture and light movement in the hair.
Work calmly and without rushing, regularly removing trimmed hair so it does not interfere with your view.
Then move to the right section: place the strands in the comb and slightly angle the scissors downward, following the natural curve of the face. Continue using the point-cutting technique, gradually shaping a light, airy, and textured fringe.
8. Make the Fringe Less Dense
If the fringe turns out too thick, it can be gently thinned using a layering technique. Comb each section upward, directing the scissors vertically into the strand and closing them slightly. This method helps remove excess weight, makes the fringe lighter, and beautifully enhances the facial features.
To do this, take a small section of the fringe between two fingers and pull it straight up vertically. Carefully slide your fingers along the length of the hair, allowing some strands to fall naturally. Then lower your fingers about 2–3 cm and perform the cut using the point-cutting method.
This approach creates a soft texture without sharp lines, preserves natural volume, and achieves a lighter, more harmonious result.
9. Set the result with hairspray
Hold the hairspray bottle at about arm’s length from your face and spray the product in a light, even layer. Then release the remaining sections from the clips and style your hair as usual — this will help secure the shape and achieve a neat, polished, and finished look.