How to Create the Perfect French Manicure at Home: A Simple Step-by-Step Guide with Photos
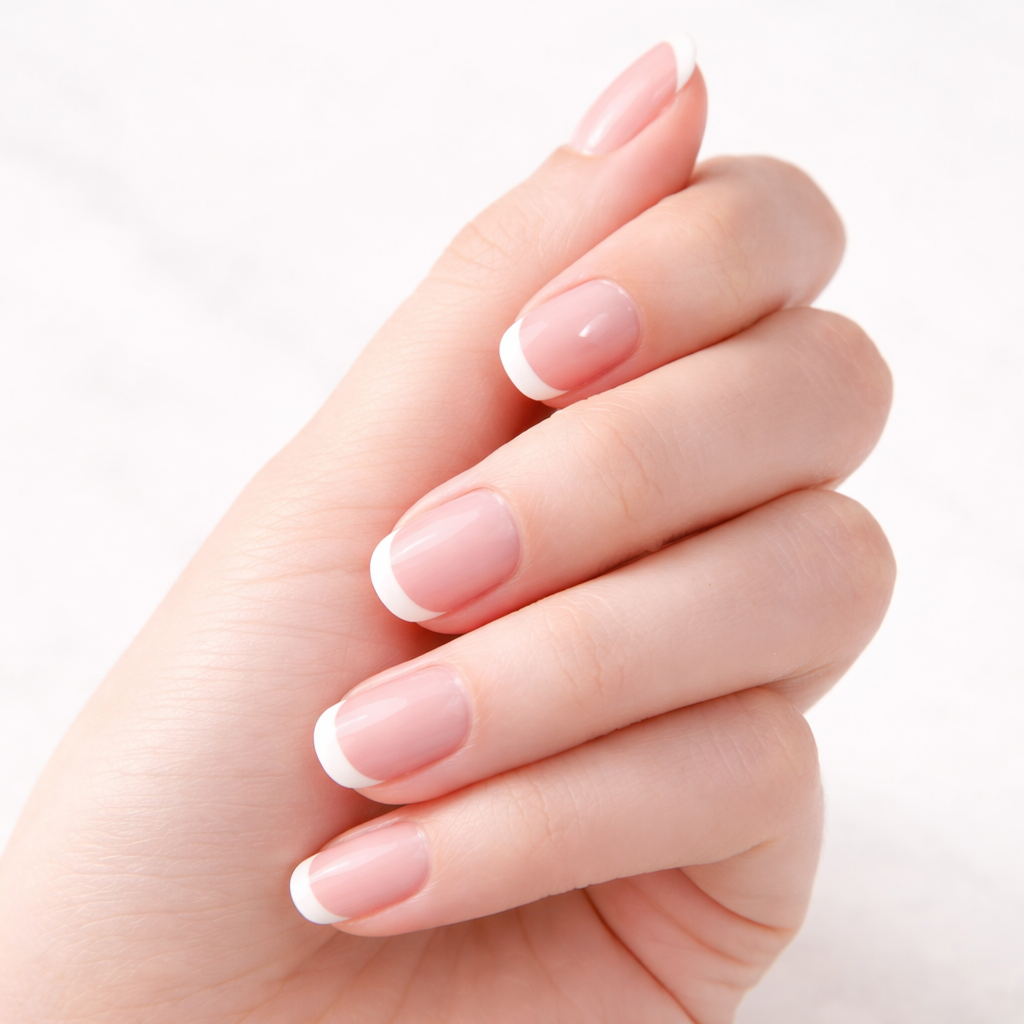
If we talk about the most classic and versatile manicure of all time, French manicure immediately comes to mind. This simple and elegant design is always in style and suits any occasion — from everyday office wear to a formal wedding day. Usually, achieving a perfectly straight white tip requires a visit to a salon, but why not try enhancing your French manicure at home? With the right tools, high-quality polishes, and a few professional tips, doing a French manicure is easier than it seems.
Check out our new article — it features a detailed step-by-step guide that will help you create a salon-quality French manicure right in the comfort of your own home.
• Nail file • Nail buffer • Base coat • Nude or light pink nail polish • Tape or French manicure stencils • Top coat • Cuticle oil • Cotton swabs with pointed tips and nail polish remover
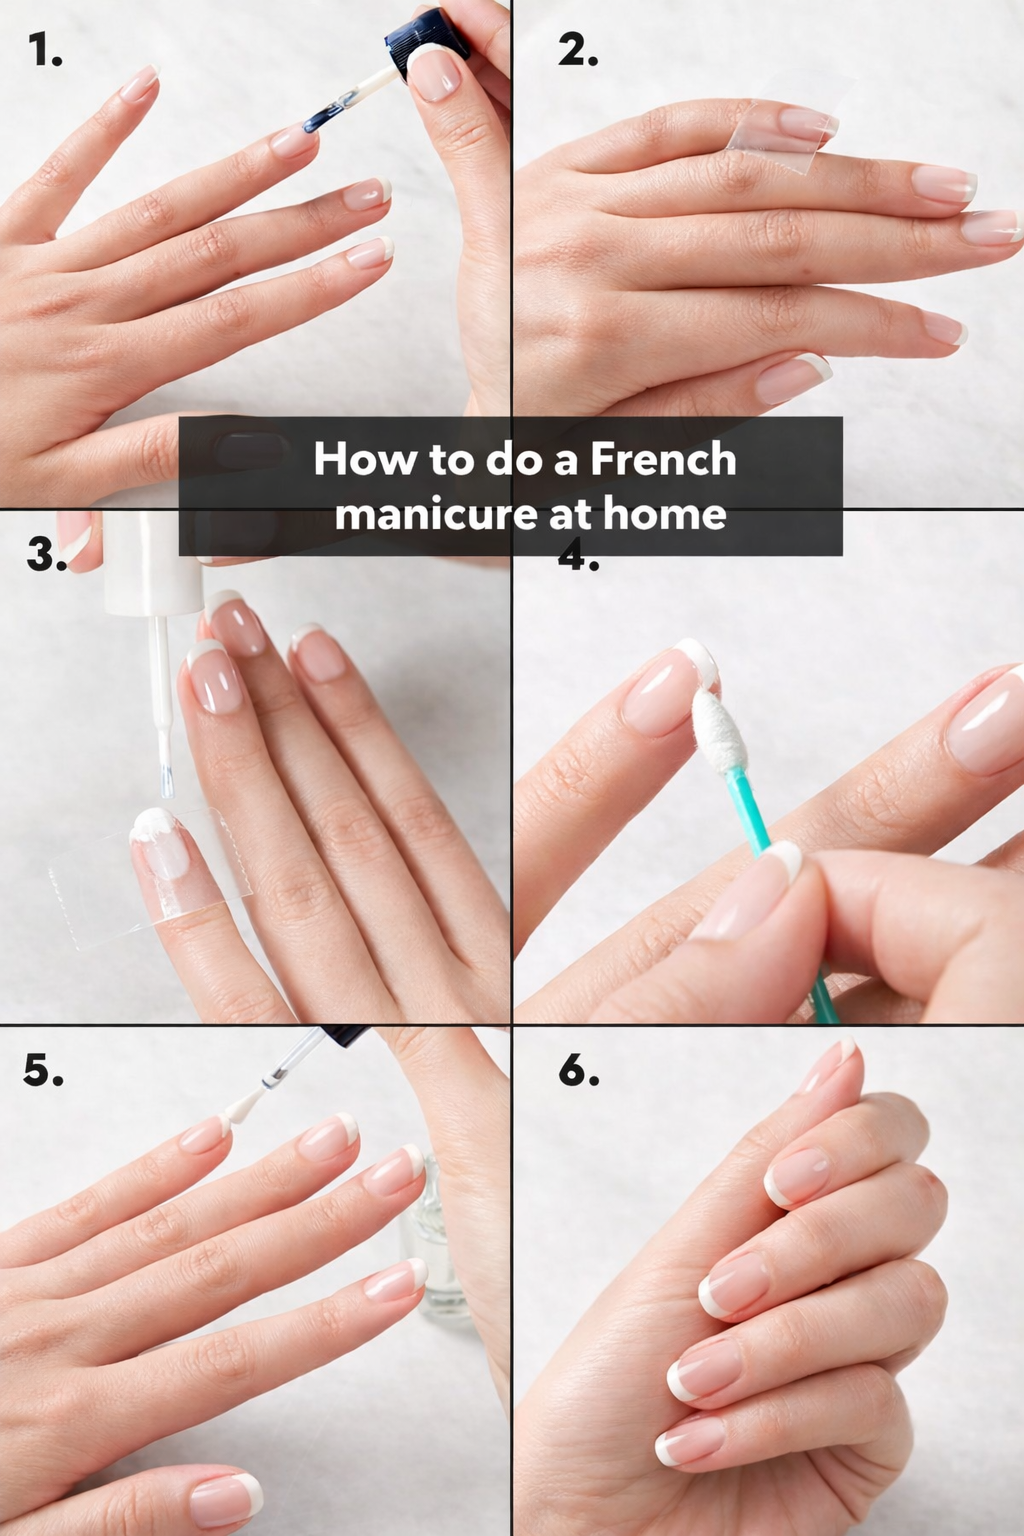
How to do a French manicure at home
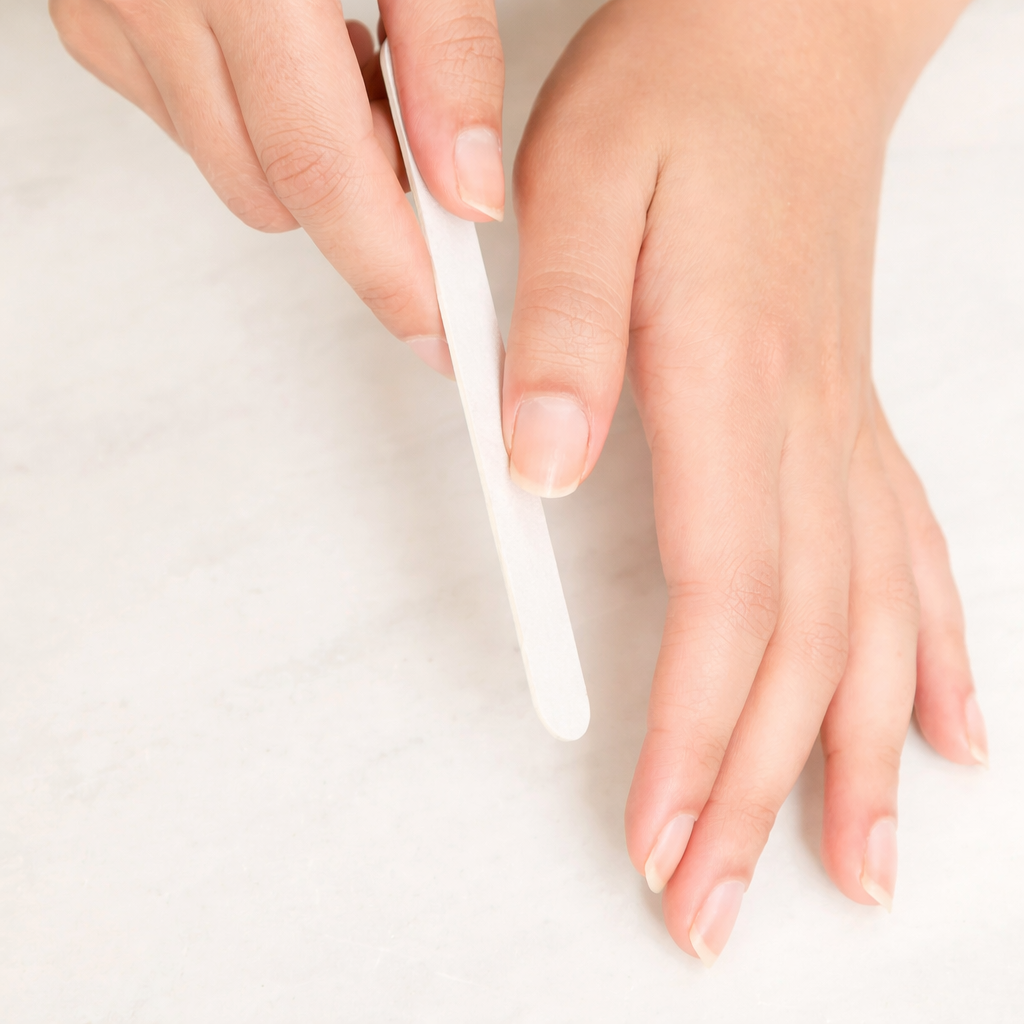
1. Clean and shape your nails . Classic French manicure should look flawless, so it’s important to pay attention not only to the white tip but also to the careful preparation of the nail plate. Start by washing your hands and gently removing any old polish using a non-acetone remover. To tidy up the edges, it’s convenient to use an orange stick with a cotton tip soaked in nail polish remover.
Although French manicure works for any nail shape and length, the ideal choice would be medium-length almond-shaped nails or short square nails. Make sure the edges are even and free of chips — only then will the white tip appear neat and symmetrical.
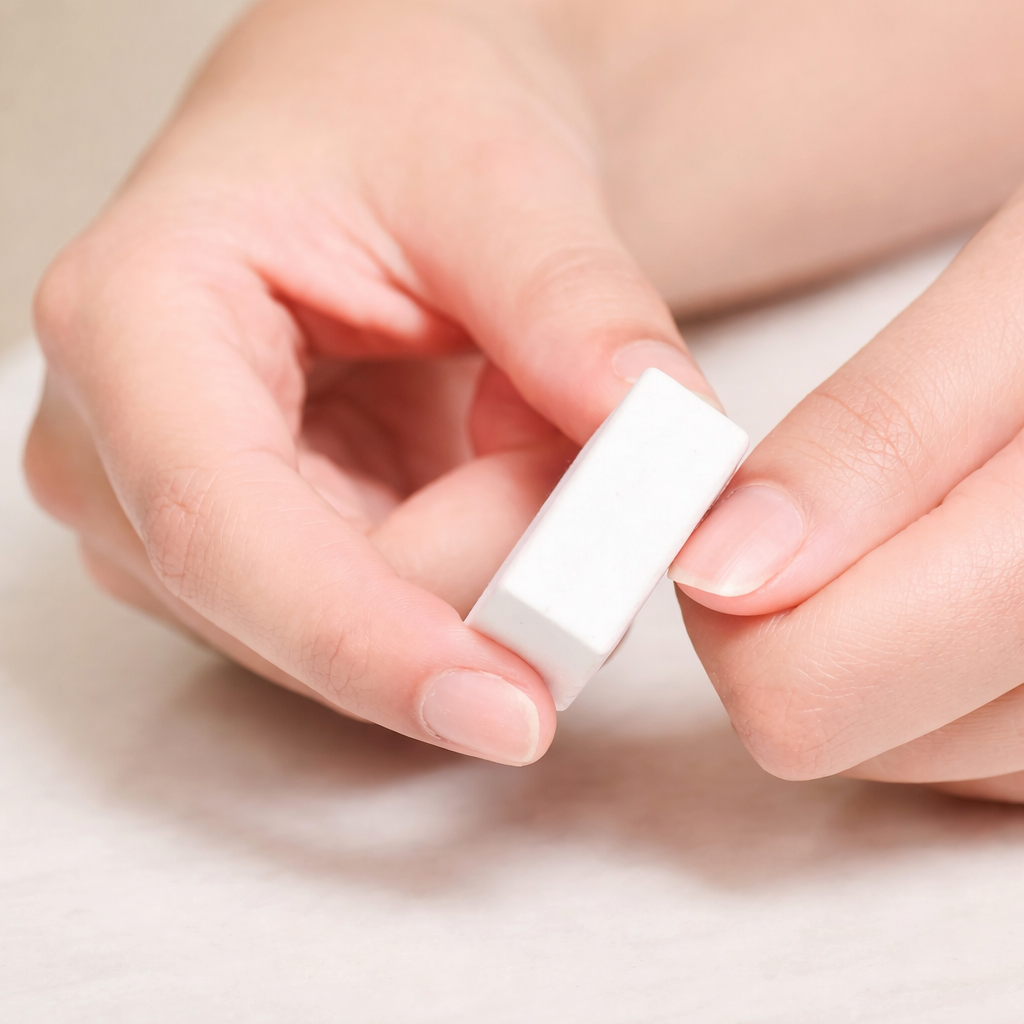
2. Buffing and preparing the nail plate . One little secret to a perfect manicure is carefully buffed nails. They not only make the surface smoother but also help polish last longer. For proper buffing, use a fine-grit buffer, work with gentle motions, and pay special attention to the area around the cuticles. Don’t be afraid of buffing: damage only occurs if the buffer is too coarse or if the nails are over-processed.
Before pushing back your cuticles, apply cuticle oil to protect and moisturize the skin. Then pamper your hands with a gentle scrub and follow with a nourishing cream. And before applying the base coat, make sure to degrease the nail plate — this removes any cream residue and ensures perfect polish adhesion.
3. Apply the base coat . Now let's move on to the actual nail painting. For a classic French manicure, you will need two shades: one for the base and one for the tip of the nail. While French manicures allow endless experimentation with colors and shapes, here we will stick to the traditional version.
Start with a thin layer of base coat — it provides a strong adhesion for the polish to the nail plate and protects the nails from yellowing and stains. This step is especially important: professional nail technicians never skip the base coat, and its absence is often the main reason a DIY manicure doesn’t last as long.
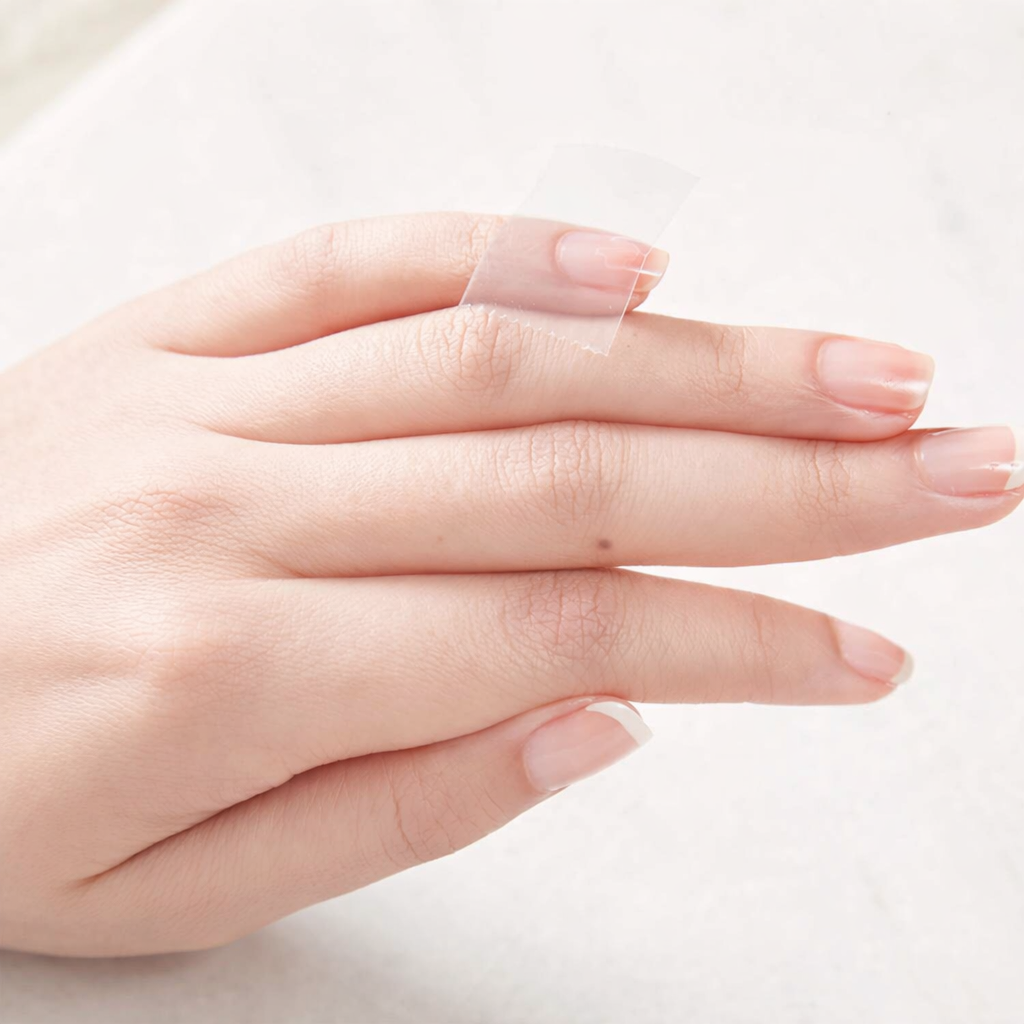
4. Apply tape. If your hand isn’t completely steady yet, or you’re just learning how to do at-home manicures, special nail stickers can come to the rescue — or, in a pinch, regular tape will do. Wait until the base coat is fully dry, then press the tape firmly where you want to finish the tip line. The shape of the line can be straight or curved — follow the natural contour of your nail. To visually elongate your nails, trace along their natural curve.
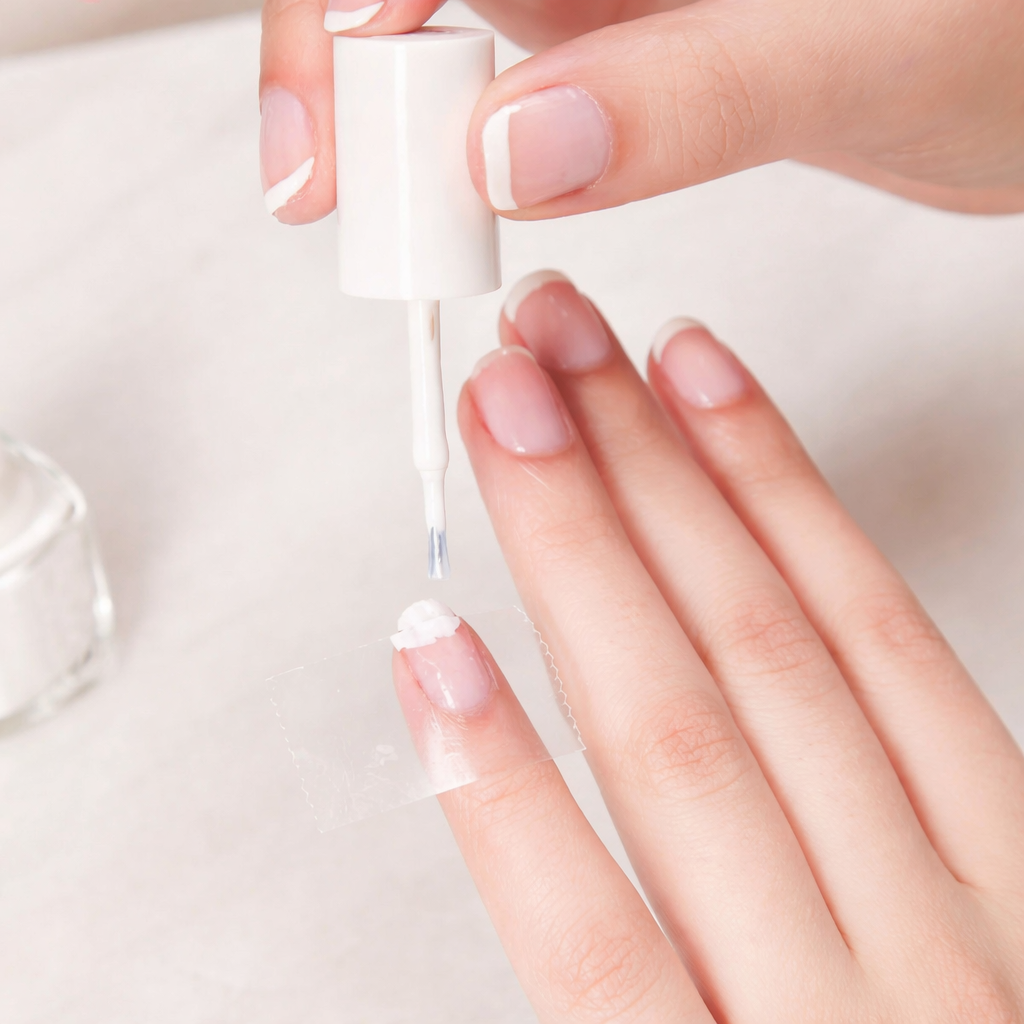
5. Paint the tip of the nail . Coat the free edge of the nail with your chosen white polish. To achieve a smooth, opaque line in one stroke, opt for bright, clean white shades.
TIP: When painting freehand, keep the brush steady and rotate only your finger to create a neat, curved line. For better control, hold the brush between your thumb and middle finger, and lightly rest your index finger on the top of the cap.
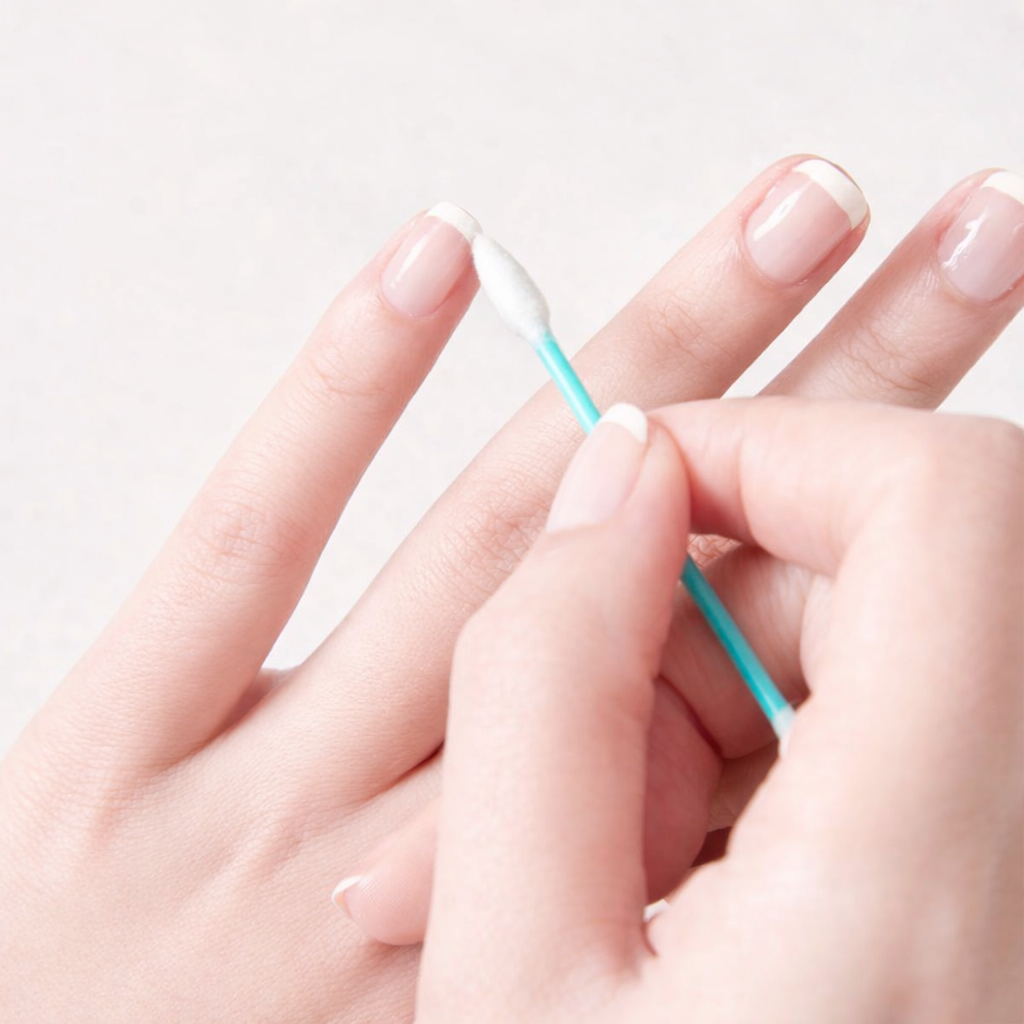
6. Round off the smile line . To create an elegant crescent instead of a straight line, use a cotton swab or a thin nail brush, carefully applying white polish to the corners of the nail.
7. Finish the manicure with a sheer pink shade. This is a professional-approved method to make a French manicure look as natural as possible: a semi-transparent pink shade hides minor imperfections and nail yellowing, creating a perfectly even base.
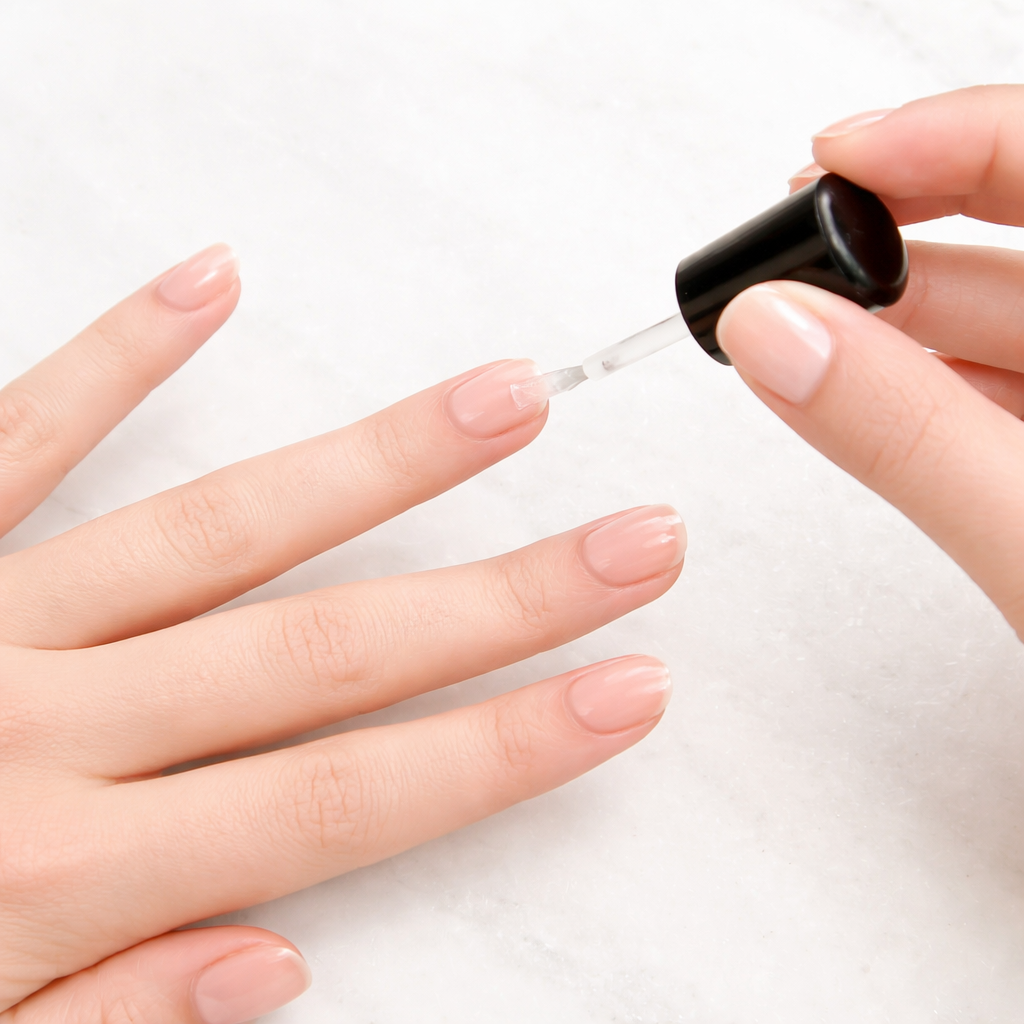
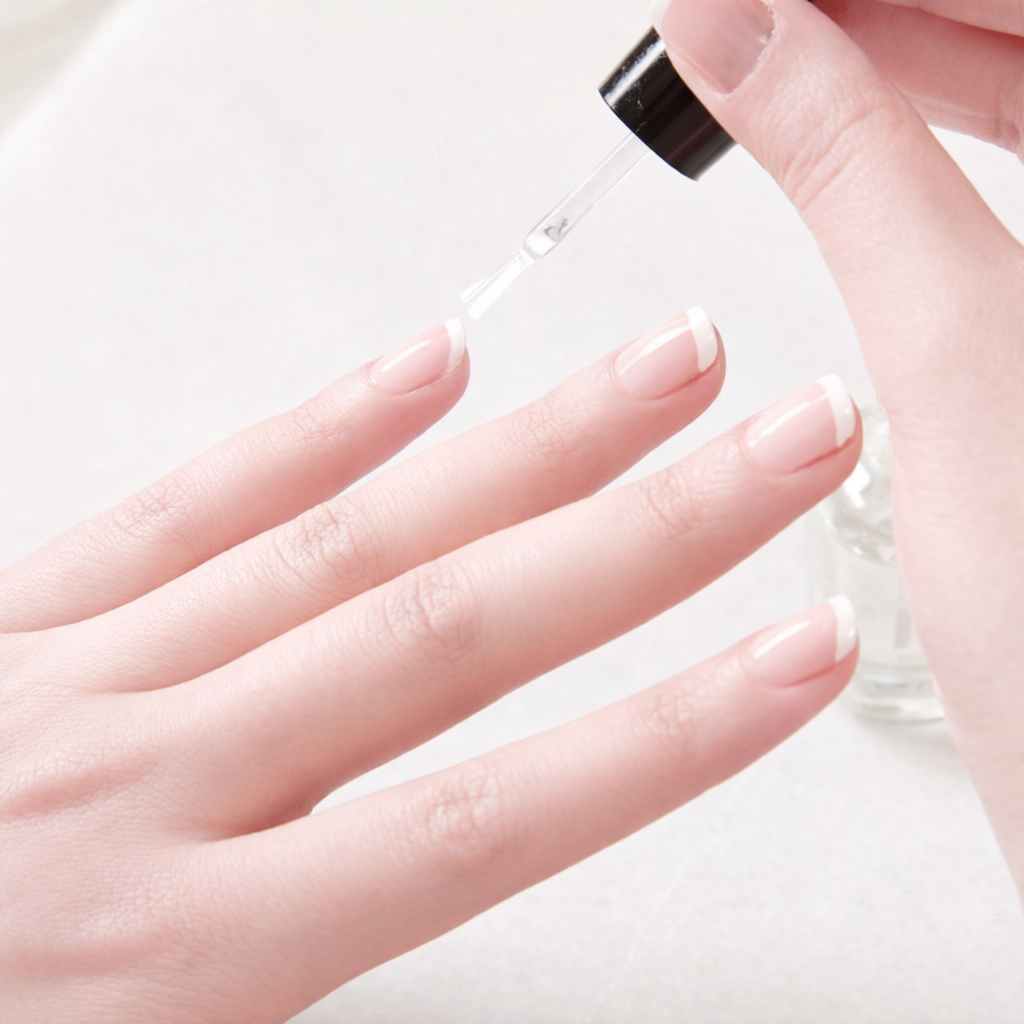
8. Apply the top coat
. After removing any leftover polish with a cotton swab soaked in nail polish remover, take care to ensure your manicure lasts. For the finishing touch and reliable protection of your French manicure, apply a thin layer of clear top coat — it will set your manicure and extend its durability.
9. Final look . And here it is — the French manicure is complete! As with any other technique, handle your hands carefully until the polish is fully dry. Drying time can take several hours, depending on the polish formula and the top coat used.