One of the easiest ways to freshen up your style in the fashion and beauty world is to update your manicure. But changing your nail polish weekly can be time-consuming, and no one likes wearing damaged nails. In such cases, acrylic or gel nails come to the rescue. Acrylic nails are famous for their durability - they can last from six to eight weeks, unlike gel nails, which last two to three weeks. In addition, acrylic allows you to create nails of any shape and design, which makes it especially popular among fashionistas. While constantly trying to cover up chips and cracks can be tiring, acrylic nails are a real relief as they require little maintenance. However, if you decide to remove them yourself at home, there are a few key points you should be aware of.
Although gel and acrylic nails come off in roughly the same way, the process can take longer with acrylics as they are usually thicker. Visiting a salon for professional removal is always a good option, but if you need it done quickly and don't have time to go to a master, you can try removing your nails yourself. It's important to follow all the steps to avoid damaging your natural nails. Here are five easy steps on how to safely remove acrylic or gel nails at home. Keep reading to learn professional tips.
Although gel and acrylic nails come off in roughly the same way, the process can take longer with acrylics as they are usually thicker. Visiting a salon for professional removal is always a good option, but if you need it done quickly and don't have time to go to a master, you can try removing your nails yourself. It's important to follow all the steps to avoid damaging your natural nails. Here are five easy steps on how to safely remove acrylic or gel nails at home. Keep reading to learn professional tips.
What you'll need
- Nail file
- Nail buff
- Nail clippers
- Acetone
- 10 pieces of cotton wool and 10 squares of aluminium foil
- Manicure spatula
- Cuticle oil
- Moisturising cream
1. File your nails
:max_bytes(150000):strip_icc():format(webp)/remove-fake-nails-11-8464d0be19994222b5af451e8132803a.jpg)
Before proceeding to the removal of artificial nails, it is necessary to prepare their surface with a file. Processing the nails to create roughness and remove the top layer contributes to a faster softening of the material in acetone. Careful filing of the nails is also very important.
After preparation, cuticle oil should be used. Applying oil will help keep the nails and the skin around them moisturised during the acetone removal process, which can be very drying to the skin.
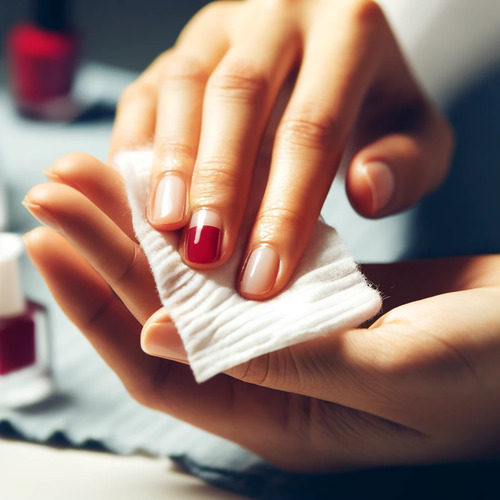
2. Soak your nails in acetone
:max_bytes(150000):strip_icc():format(webp)/remove-fake-nails-31-af0b2380784a4038ba8eb009d89dab94.jpg)
It's time to remove acrylic or gel coat. Acetone, which effectively removes these materials, is different from conventional nail polish removers as it requires a longer exposure time. There are two main methods of using acetone:
- The first method involves dipping your hands into a bowl half-filled with acetone. This method is simple and quick, although it requires you to remain immobile for up to 30 minutes. This time can be spent pleasantly, for example, watching your favourite TV series and relaxing.
- The second method is to wrap each nail in foil with a cotton disc soaked in acetone. This allows you to continue doing your business during the procedure, although it may be less comfortable.
We recommend the first method, emphasise its effectiveness, but note that prolonged exposure to acetone can dry the skin around the nails. The choice of method depends on personal preference and the ability to allocate time for the procedure. Both methods are effective, the main thing is to choose the one that suits you best.
3. Repeat the process (if necessary)
:max_bytes(150000):strip_icc():format(webp)/remove-fake-nails-41-e1820e008d524068883b04520c2167b9.jpg)
It takes about 20 to 30 minutes for the acetone to destroy the nails. The removal process will be more visible if you soak your nails in a bowl. However, if you prefer to use foil, after 20 minutes you can carefully remove it and assess the condition of your nails. You will see the material gradually dissolve. After that, you can start to gently separate the acrylic or gel from the nail using a manicure spatula. Depending on the thickness of the gel layers or the presence of acrylic, you may need to rinse your nails and repeat the procedure until the gel or acrylic can be completely removed.
4. Clean the nail plate
:max_bytes(150000):strip_icc():format(webp)/remove-fake-nails-51-461ddd2f07fe464cbafc5a755b6e1e63.jpg)
After removing the nail extensions, you can gently remove the remaining material with a manicure stick. Then, using a fine-grained file or buff, lightly work the surface of the nail plates. Once the product is completely removed, gently buff your nails. This will help smooth the surface and get rid of the last traces of the material.
When your nails are completely clean, wash your hands thoroughly and apply a nourishing oil to the cuticle and a moisturising cream to your hands. Since acetone is very drying to the skin and nails, regular use of this combination several times a day will help restore their health and appearance.
5. Take care of your nails
:max_bytes(150000):strip_icc():format(webp)/remove-fake-nails-61-d3bae9ff7e8749d88ab04358d3b3675d.jpg)
Soon after removing your nails, it's the perfect time to treat your natural nails to a new manicure. In addition to the cuticle oil and moisturiser already mentioned, your nails will benefit from a little rest before getting a new manicure. If you regularly wear false nails, it's important to give your natural nails a chance to recover for at least a few days.
FAQ
Can acrylic nails be removed quickly at home?
It is possible to remove artificial nails at home, but this process may take some time. You will need to file the nails, then gently soften them in a special liquid, after which you can carefully remove them. Try not to be in a hurry and do not peel them off quickly to avoid damaging your natural nails.
How to care for natural nails after removing acrylics?
First and foremost, you should try to keep your nails short and healthy, especially after using acrylics, which can weaken them. Moisturise your nails regularly with nourishing oils and use strengthening products if necessary to give them extra protection and repair.
Read also: How to properly file nails at home - step-by-step instructions