How to Do a French Manicure with Gel Polish at Home: Step-by-Step Guide
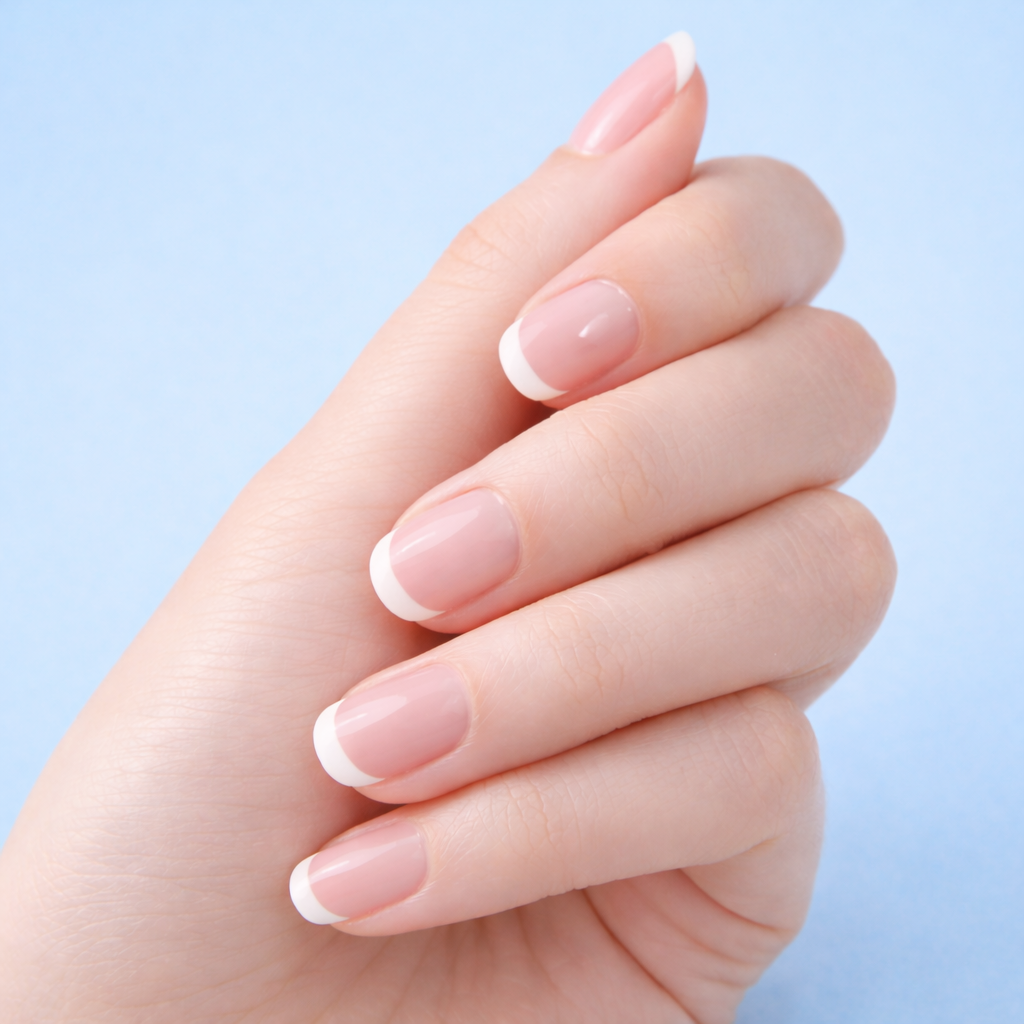
French manicure is the timeless design that has long won the hearts of millions of women. And it’s no surprise: it looks neat, delicate, and minimalist, suits any nail shape, and remains appropriate for any occasion — whether it’s a wedding, office routine, a walk with friends, a birthday celebration, or even a New Year’s Eve party.
But what should you do if you’re tired of visiting the salon regularly and spending significant amounts of money on manicures? Or if your schedule is so busy that you simply don’t have time to see a nail technician? In that case, a great solution is to learn how to create the perfect French manicure yourself, in the comfort of your home, without rushing, while listening to your favorite music or watching a movie.
The good news is that mastering the French manicure technique is not as difficult as it may seem at first glance. The key is to prepare all the necessary tools and materials, along with a little patience.
In our new article, we will explain in detail how to perform a French manicure with gel polish at home, and we will also share recommendations on choosing high-quality tools and materials that will significantly simplify the process and help you achieve a neat, salon-quality result.
You will need:
• Nail file
• Nail lamp
• Nail primer
• Nail buffer
• Gel polish base coat
• White gel polish
• Nude or light pink gel polish
• Tape or French manicure nail guides
• Top coat
• Cuticle oil
• Orange wood sticks
• Gel polish remover
• Nail dehydrator (nail cleanser / degreaser)
How to do a French manicure on yourself
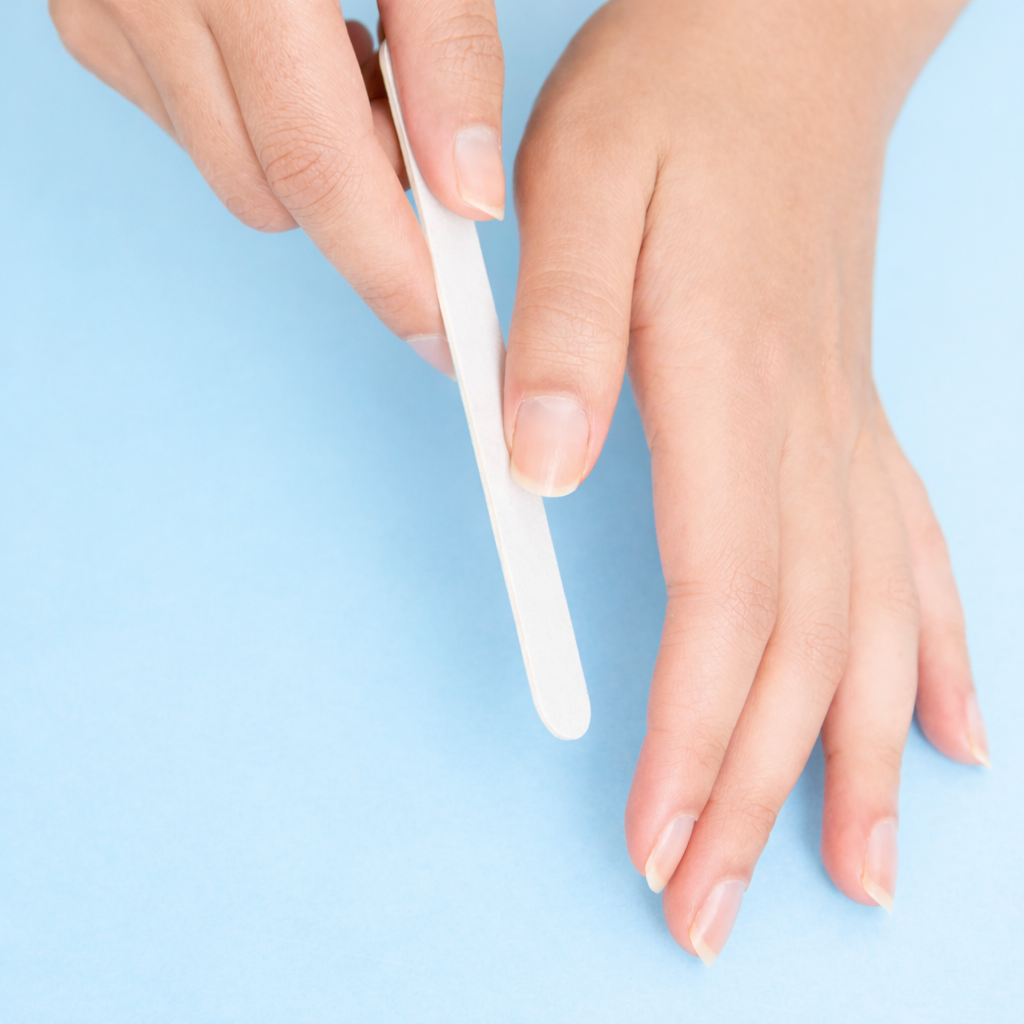
1. Preparing the nail plate . A classic French manicure should look flawless, so it is important to focus not only on a neat white line at the tip but also on thorough nail preparation. Start by washing your hands and carefully remove any old polish (if present) using a special remover.
The French manicure is universal and suits any nail shape and length; however, it looks especially elegant on medium-length almond-shaped nails or short square nails. It is important that the free edge is even, without chips or irregularities — this is what ensures a clean, precise, and symmetrical white line.
Shape your nails as desired using a nail file, moving in one direction only — this helps prevent splitting and maintain the strength of the nail plate.
Gently treat the cuticles: push them back with an orange stick or use a cuticle remover for a more delicate and safe result.
For nail buffing, choose a high-grit buffer and work with light, gentle movements, paying special attention to the area near the cuticle — this will help smooth the nail surface without unnecessary damage.
Then degrease the nail plate with a special prep product and apply a primer. This step improves adhesion and significantly extends the durability of the manicure.
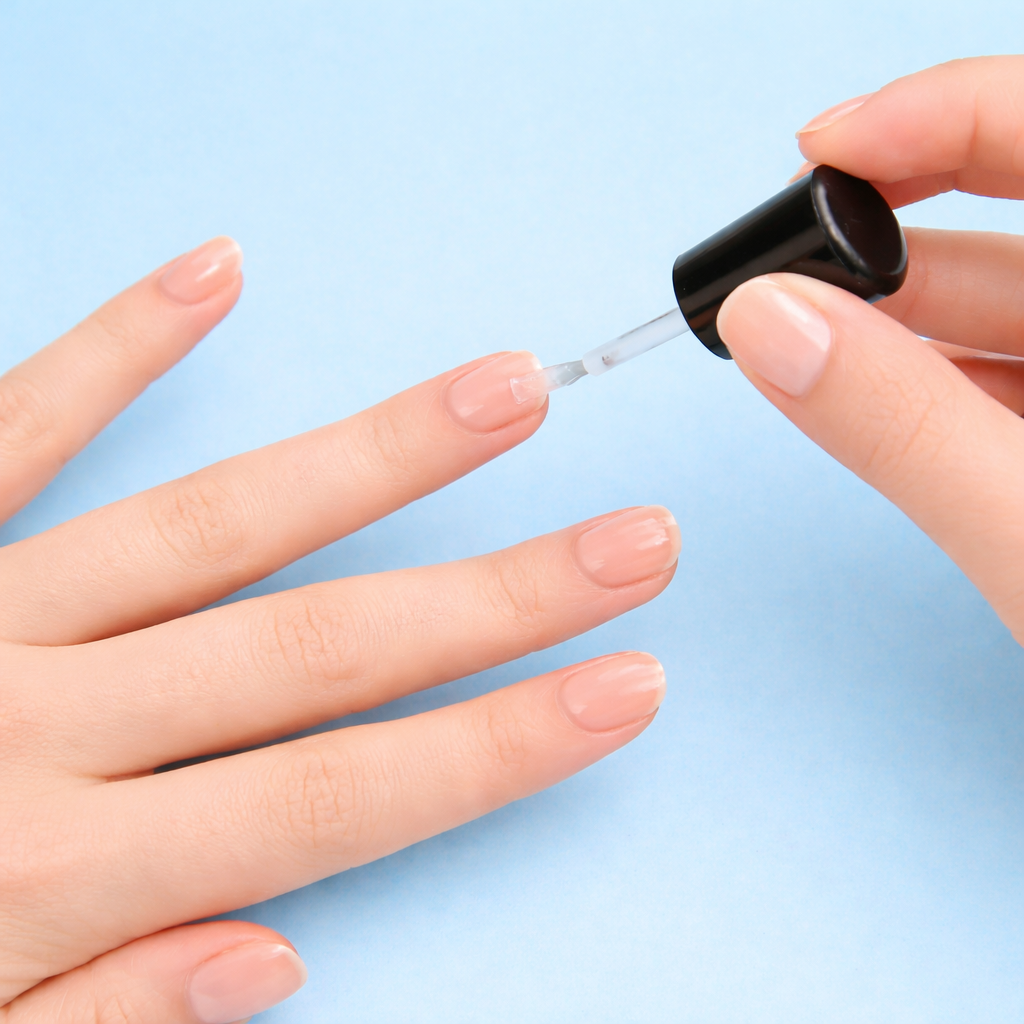
2. Apply the base coat . Apply a thin layer of base coat — it is what ensures reliable adhesion of the gel polish to the nail plate. This step is especially important, as the durability of the manicure directly depends on it: professional nail technicians never skip the base coat, and its absence most often leads to chipping and lifting.
After application, carefully cure the nails in a lamp: in an LED lamp — for 30–60 seconds; in a UV lamp — for about 1–2 minutes.
3. Camouflage (the base of the French manicure) . Choose a nude or soft pink gel polish, depending on the base color you want to achieve. Apply 1–2 thin layers, spreading the product evenly over the nail plate. Cure each layer thoroughly in the lamp.
TIP: For a perfect French manicure, it’s best to choose semi-transparent shades — they look natural and elegant, giving a refined, expensive finish.
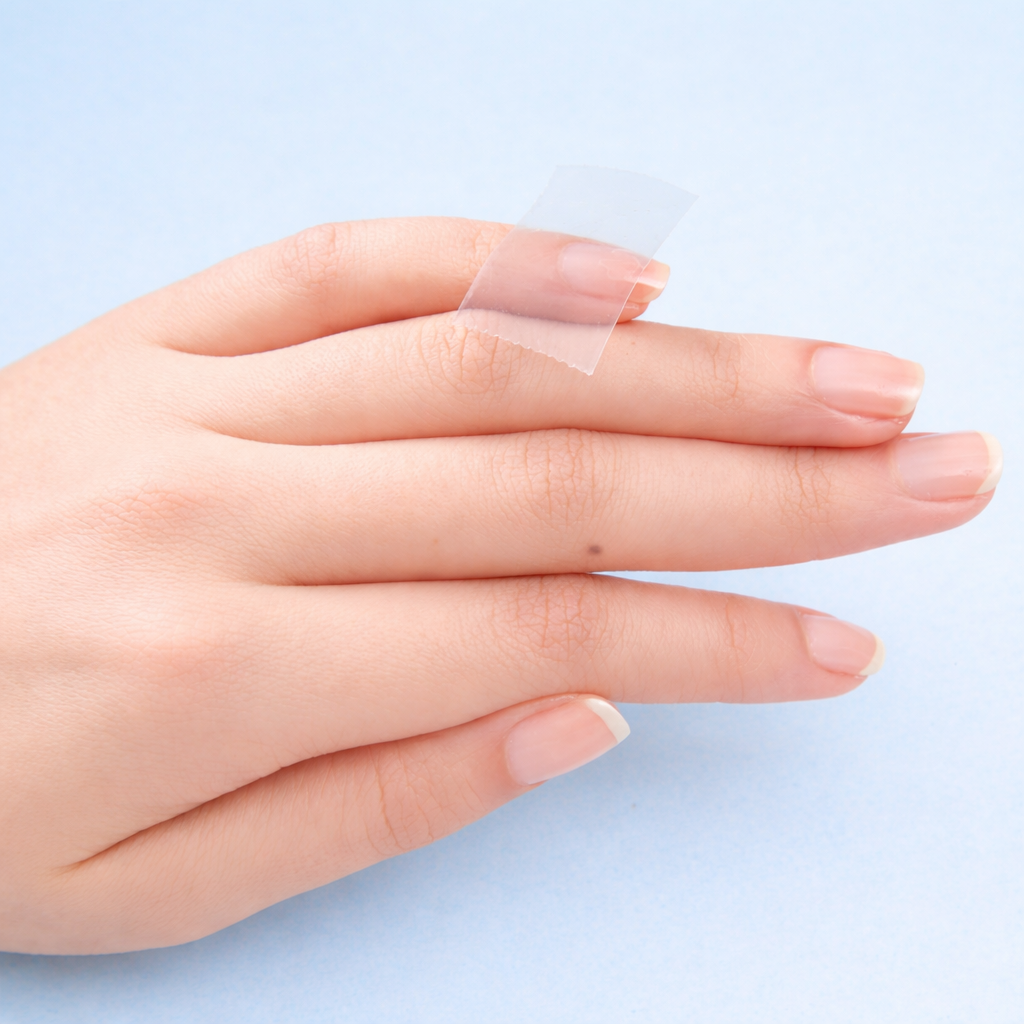
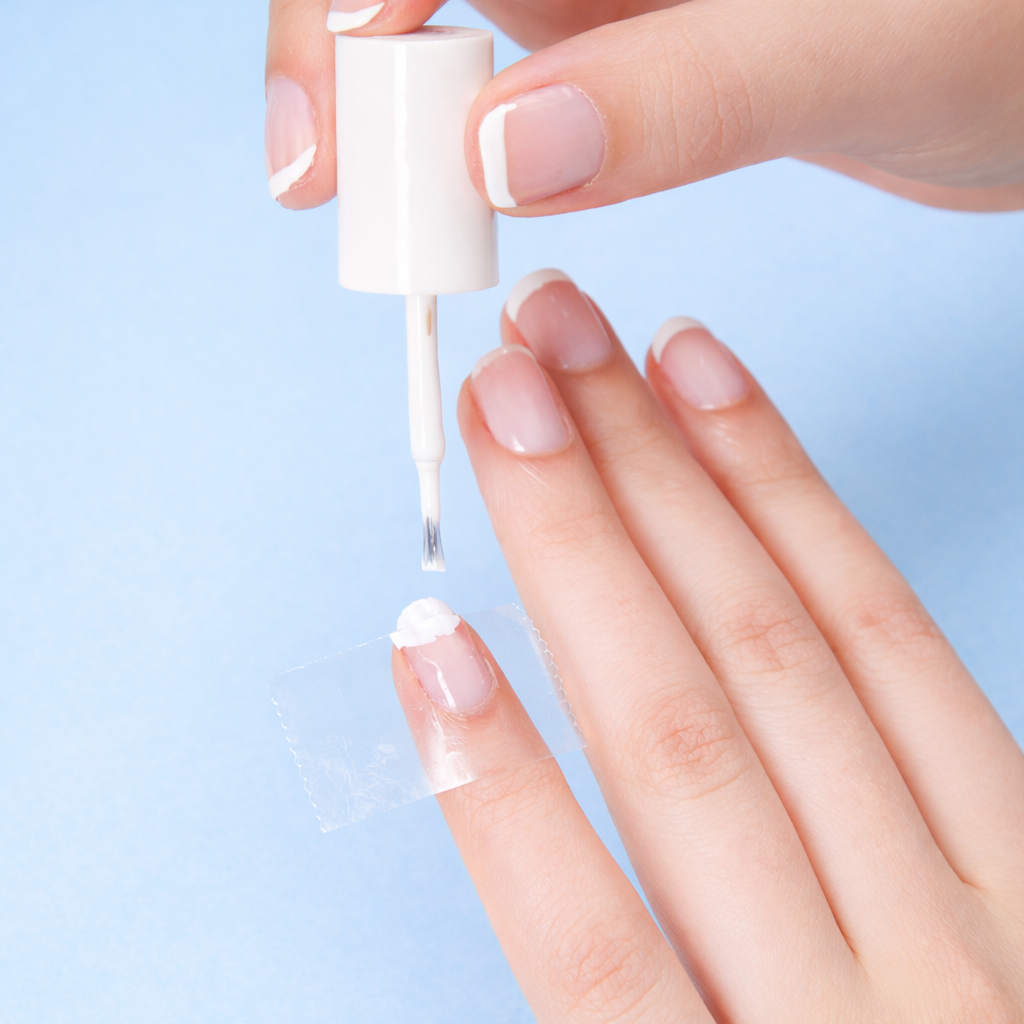
4. Apply tape or French manicure stencils to create the “smile line” . If you are just starting to master at-home manicure or do not yet feel completely confident with your technique, special nail guides will help you a lot. In an emergency, you can also use regular tape — it will work as well.
Carefully and firmly secure the tape in the area where the tip line should be. The shape can be anything: perfectly straight for a classic effect or softly curved for a more delicate and natural result.
To visually elongate the nails and make the manicure look more refined, try to follow the natural curve of the nail when shaping the tip.
5. Paint the nail tip . Cover the free edge of the nail with the chosen white gel polish, carefully forming a clean and even line. For a dense, crisp result without gaps from the very first coat, choose rich, pure white shades with good pigmentation. After application, cure the coating in a lamp according to the manufacturer’s instructions.
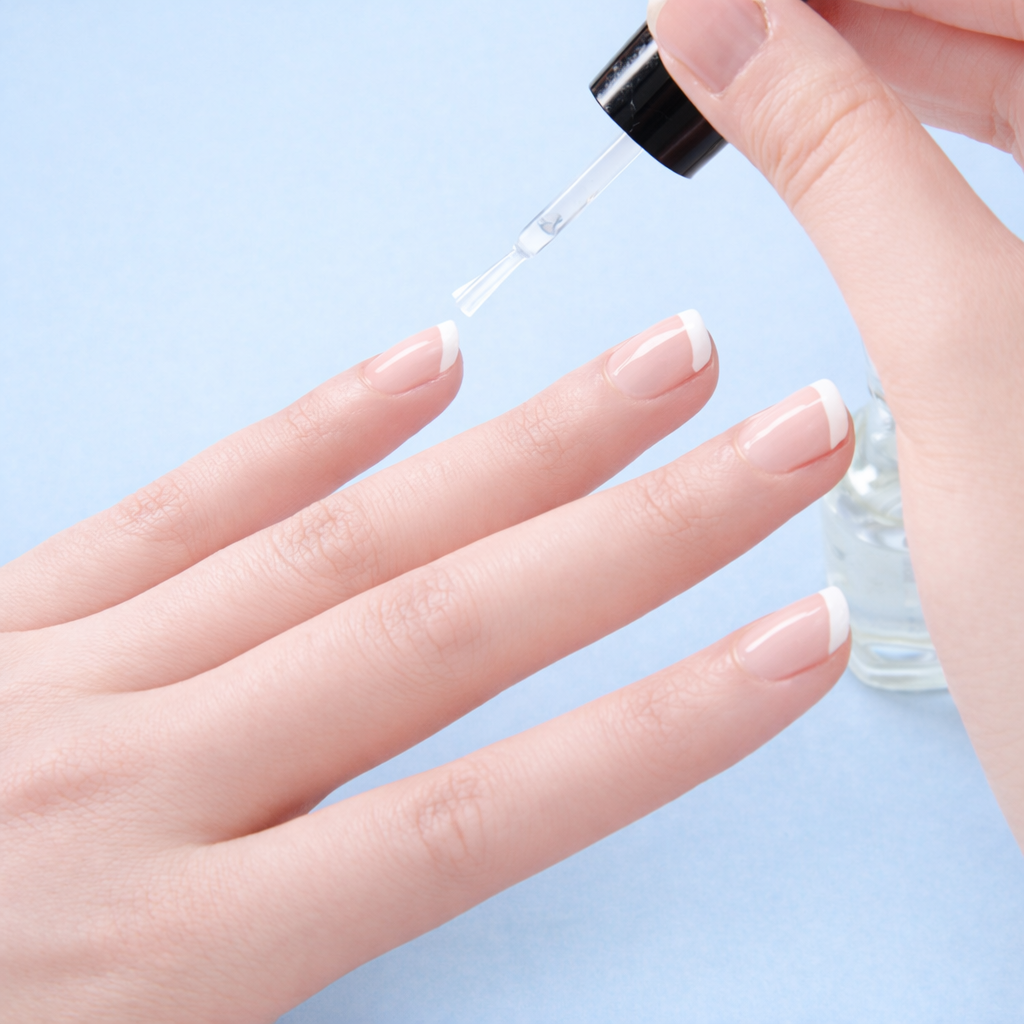
6. Apply the top coat
. In conclusion, it is important to take care of the manicure’s longevity. For the final touch and reliable protection of the French design, apply a thin layer of clear top coat — it will seal the coating, add a glossy shine, and significantly extend the durability of the manicure. After that, thoroughly cure the nails in a lamp according to the manufacturer’s recommendations.
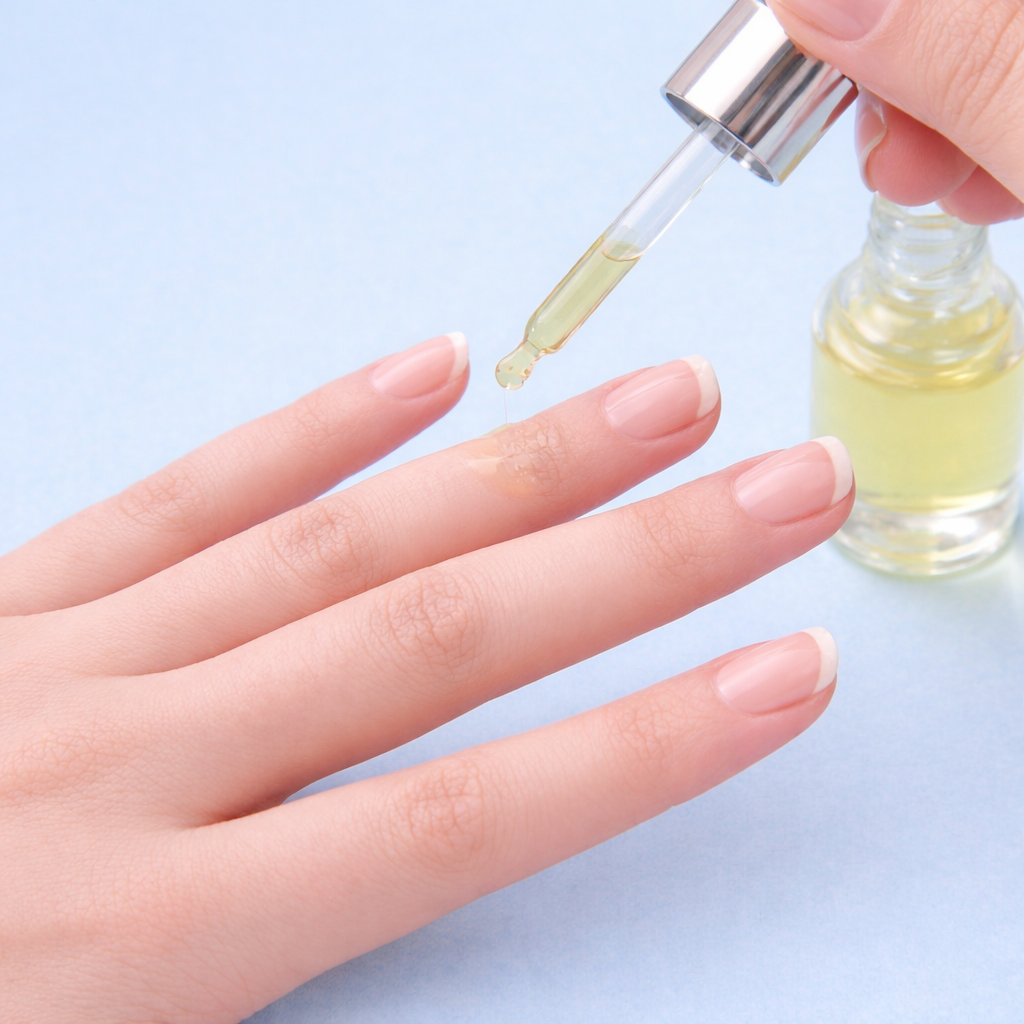
7. The Final Touch . Apply cuticle oil and gently massage the skin around the nails until fully absorbed. Use soft movements to distribute the product over the cuticle and sidewalls to moisturize the skin and improve its condition.