
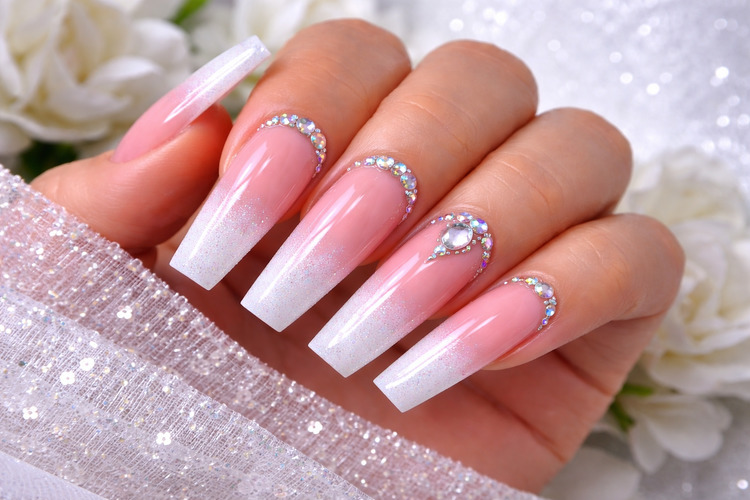
If you’ve ever had acrylic nails done, you’ve probably found yourself thinking that the length turned out a bit too extreme. And although most professionals advise against trimming acrylic nails on your own and recommend leaving this procedure to specialists, experienced nail artists assure that, with the right approach, you can carefully shorten acrylic nails at home—without harming your natural nail.
The key to safely shortening acrylic nails at home is having the right tools, precise movements, and taking your time.
In our new guide, you’ll find a detailed step-by-step tutorial on how to shorten acrylic nails at home, along with a list of tools to add to your home manicure kit.
What to Do if Your Acrylic Nails Are Too Long
Depending on their length and thickness, acrylic nails can be shortened at home without ruining their appearance. Short and thin acrylic nails are usually easy to trim and file neatly. However, long acrylic nails are much trickier due to the apex curve built into the nail structure.
The apex provides the proper balance, strength, and stability of the nail. If trimmed incorrectly or excessively, nails can appear unbalanced, bulky, or visually too thick.
If the acrylic loses balance and becomes overly dense, the risk of breakage increases significantly, which can lead to serious damage to the natural nail.
Although it is technically possible to shorten acrylic nails on your own, we still recommend leaving this procedure to a professional nail technician. This helps prevent mistakes and protects the health of your natural nails. Additionally, after trimming and filing, the free edge of the nail is left unsealed. As a result, the coating may start chipping or peeling much faster, depending on the material and technique used.
However, if you decide to shorten your acrylic nails yourself, we recommend following these tips:
Necessary Materials and Tools:
- Cotton pads
- Nail polish remover
- Nail scissors or nail clippers
- Cotton pads
- Nail polish remover
- Nail scissors or nail clippers
- Nail file 100/180 grit
- Buffer
- Nail polish
- Top coat
1. Choose Your Preferred Method
There are two ways to shorten acrylic nails at home. The first is to remove the polish before trimming, which is especially recommended for strict nail shapes such as ballerina or stiletto. The second is to leave the polish on and start shaping immediately, which is often used for gel polish nails.
2. Optional: Remove Nail Polish
Remove polish using a cotton pad and acetone, especially if your acrylic nails are ultra-long and reinforced. While it may feel like a waste to remove a beautiful manicure, after shortening, reinforced nails often look too bulky and require extra filing to even out the surface. This will inevitably change the appearance of the design, so removing the polish beforehand is the neatest and most effective way to prepare.
Note: This tip applies only to regular nail polish.
3. Choose Your Desired Length and Shape
Once you decide how much you want to shorten your acrylic nails, you can begin trimming. Remember: acrylic doesn’t cut like natural nails. You shouldn’t try to cut it in one motion, as the material may crack in the middle.
Hold the scissors perpendicular to the free edge. Start trimming from one side, then move to the other. Alternate the cuts until they meet in the center and the tip is fully removed.
For convenience, use special acrylic nail clippers—they make the process easier and minimize the risk of cracks.
4. Optional: Reduce Nail Thickness
When working with very long acrylic nails, you may want to reduce extra thickness, especially at the tips. Sometimes the thick part was originally intended to support the structure, but if left uncorrected, the free edge can feel too dense, making everyday tasks—like picking something up, fastening a shirt, or putting on earrings—uncomfortable.
To avoid this, hold the nail file horizontally along the nail. Slightly tilt it downward toward the free edge and file using up-and-down motions with moderate or firm pressure. Continuously check that the tip thickness is even from all sides.
5. File the Nails
After trimming and thinning, carefully file the nails so the edges are smooth and don’t catch on clothing or objects. File following the natural nail shape using a 180/100 grit file. Check the nails from all angles to ensure the shape is neat, even, and symmetrical.
6. Buff the Surface
If you removed polish, buff the entire nail surface with a buffer and smooth the free edge if you haven’t done so yet. This preparation ensures better adhesion for your new polish. After buffing, thoroughly wash your hands to remove dust created during filing.
7. Paint Your Nails
Now that the acrylic nails are shorter, it’s time to refresh the polish or adjust the design if you chose not to remove your previous manicure. Regardless of the method, be sure to seal the nails with a top coat—especially the free edge—to enhance shine and prolong the manicure’s durability.